

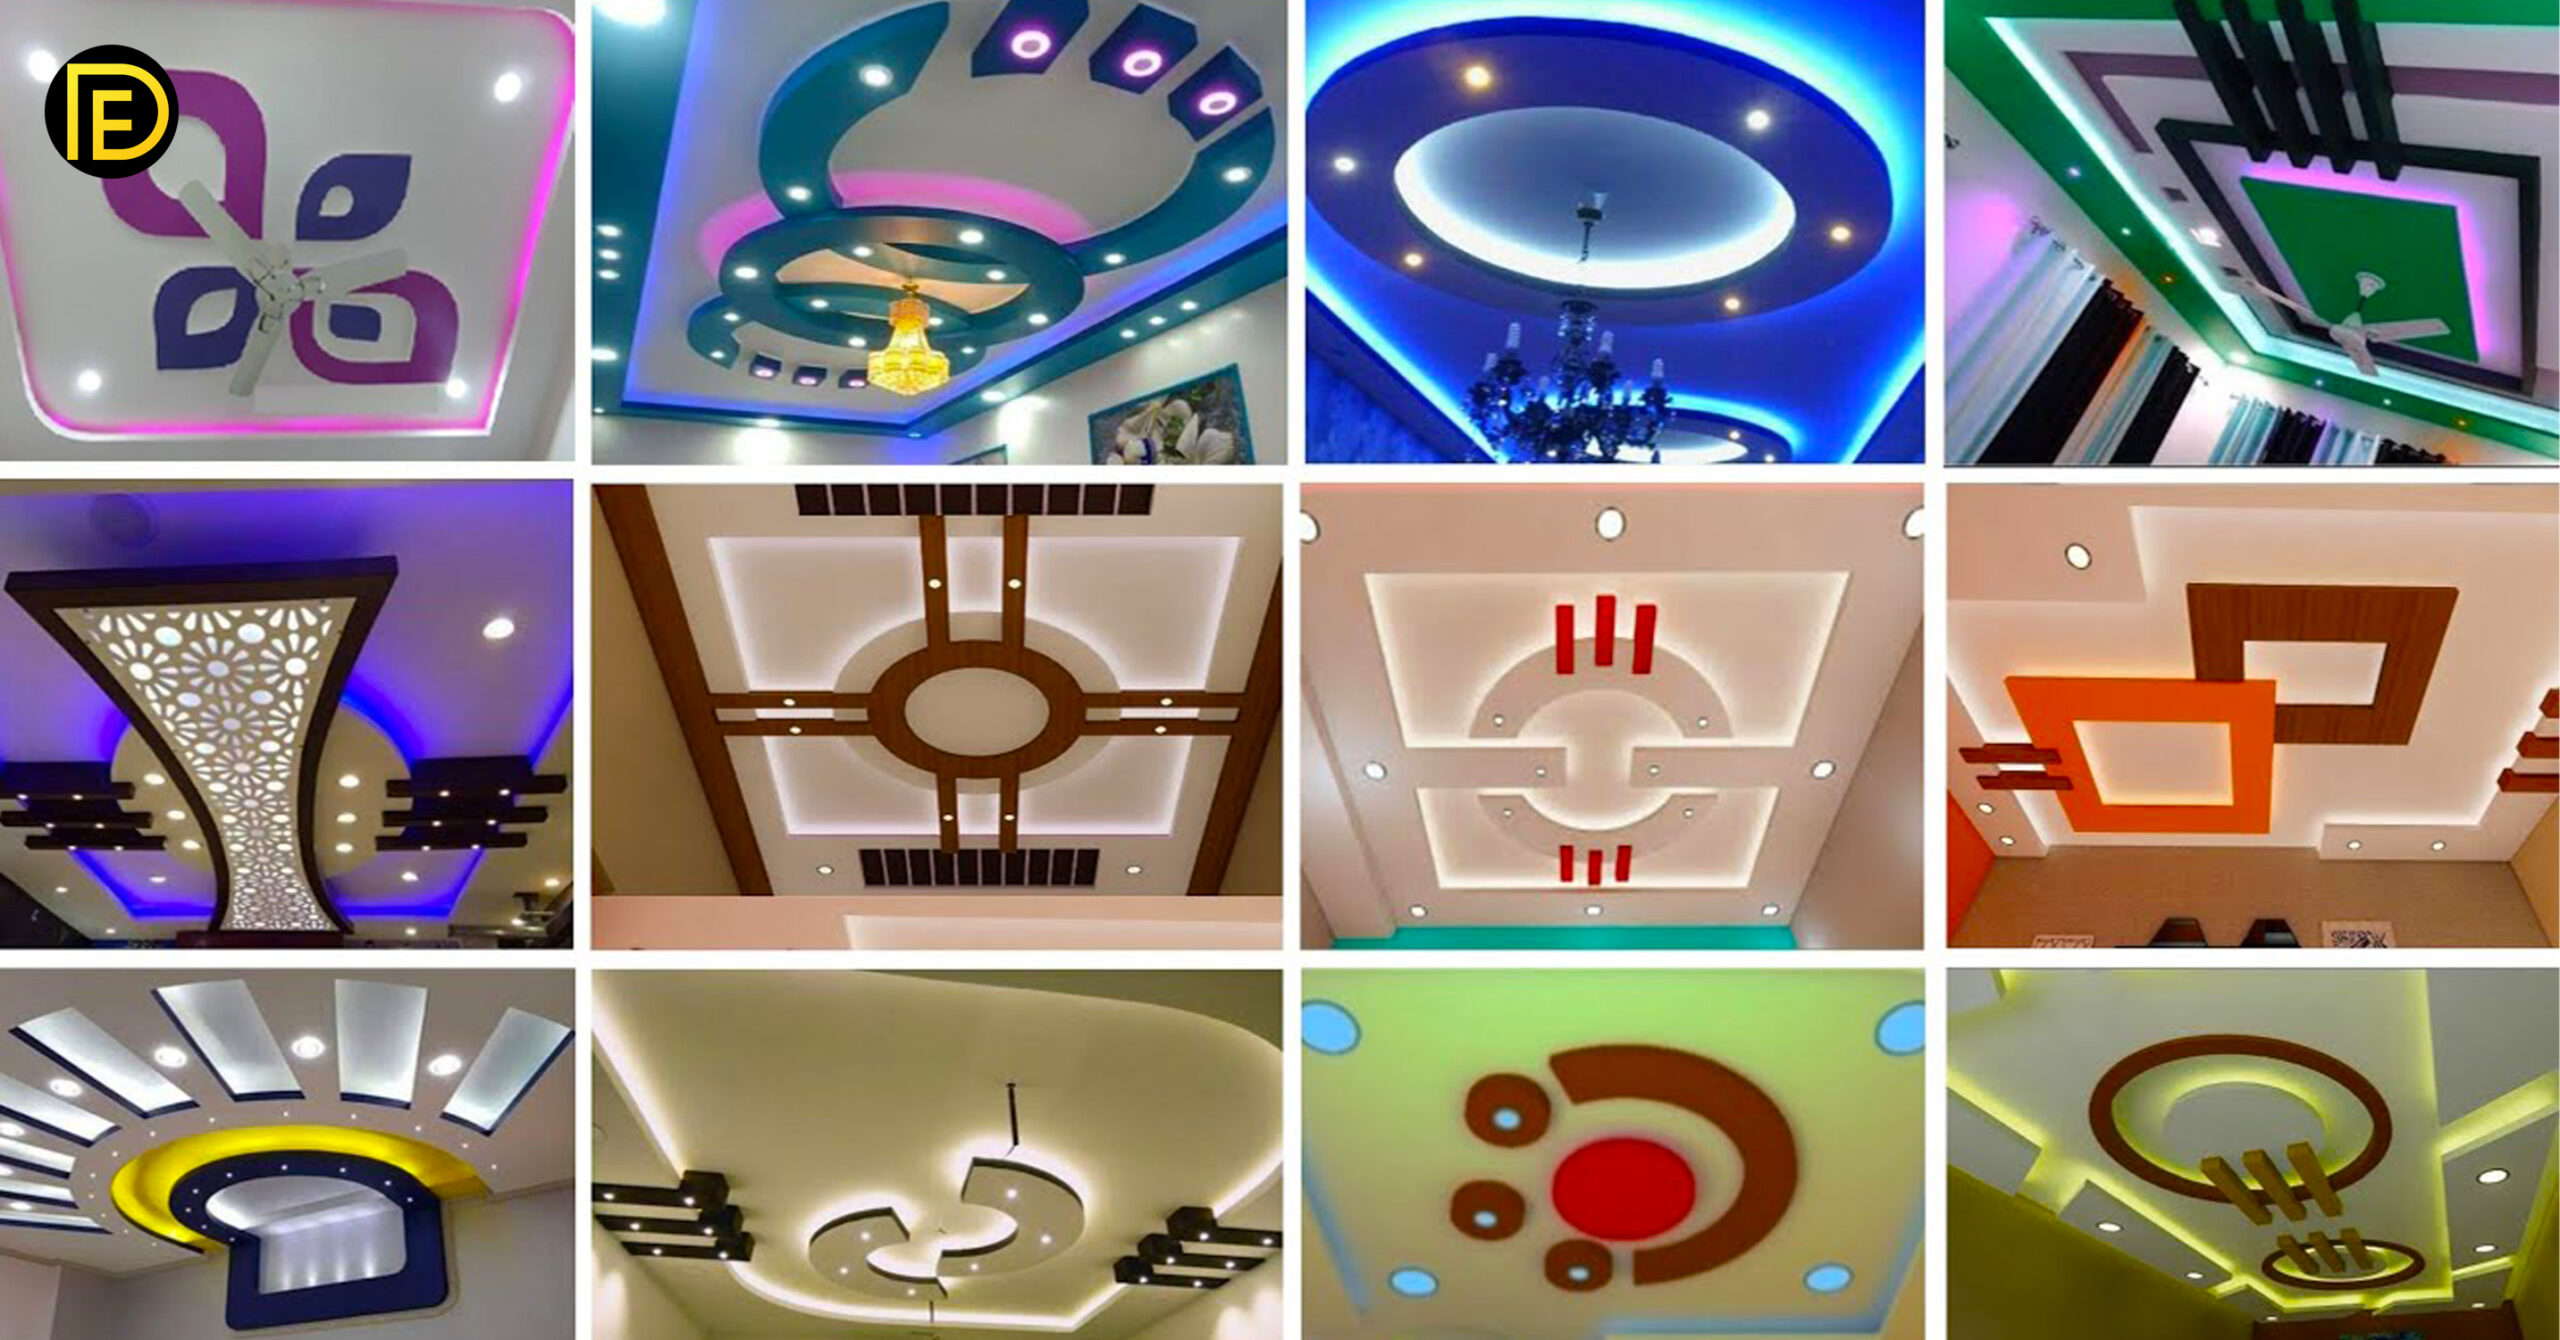
STEP 1
Draw a Room Scale
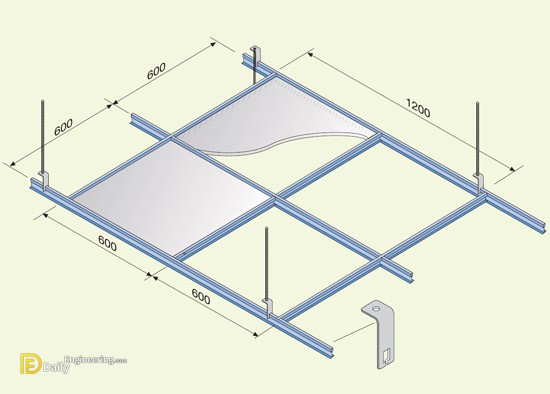
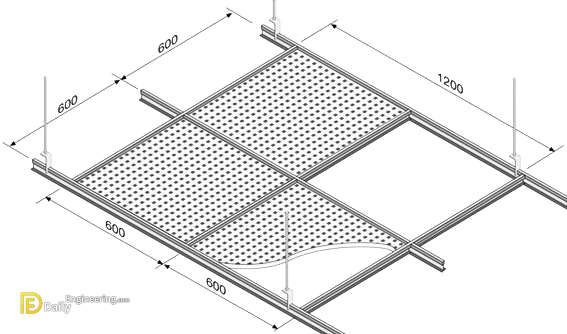
Draw the exact dimensions of the room to scale on graph paper. Choose from either a 2′ x 2′ or a 2′ x 4′ pattern. The pattern size will determine the material requirements for the ceiling. For the 2′ x 4′ pattern, install the patterns in a standard or reverse pattern. Each pattern offers a different appearance.
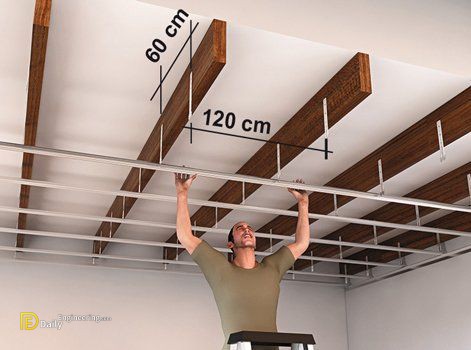
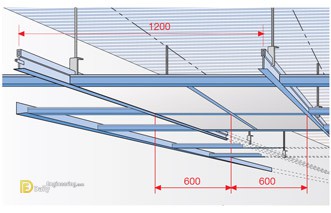
Sketch various layout possibilities for the planned ceiling. It is important to space the cross tees so the border panels at the ends of the room are equal and as large as possible. With a 2′ x 4′ pattern, space the 4-foot cross tees 2 feet apart. For a 2′ x 2′ pattern, add 2-foot cross tees between the midpoints of the 4-foot cross tees.
STEP 2
Choose the Lighting Location
If the ceiling will be recessed and built-in lighting will be installed, decide where to locate the panels of light and clearly identify them on the drawing. Determine the exact height at which the suspended ceiling will be installed. Allow a minimum of 3 to 4 inches for clearance between the old ceiling and the new ceiling. Keep in mind that additional clearance will be required if recessed lighting is being used.
STEP 3
Attach Wall Angles
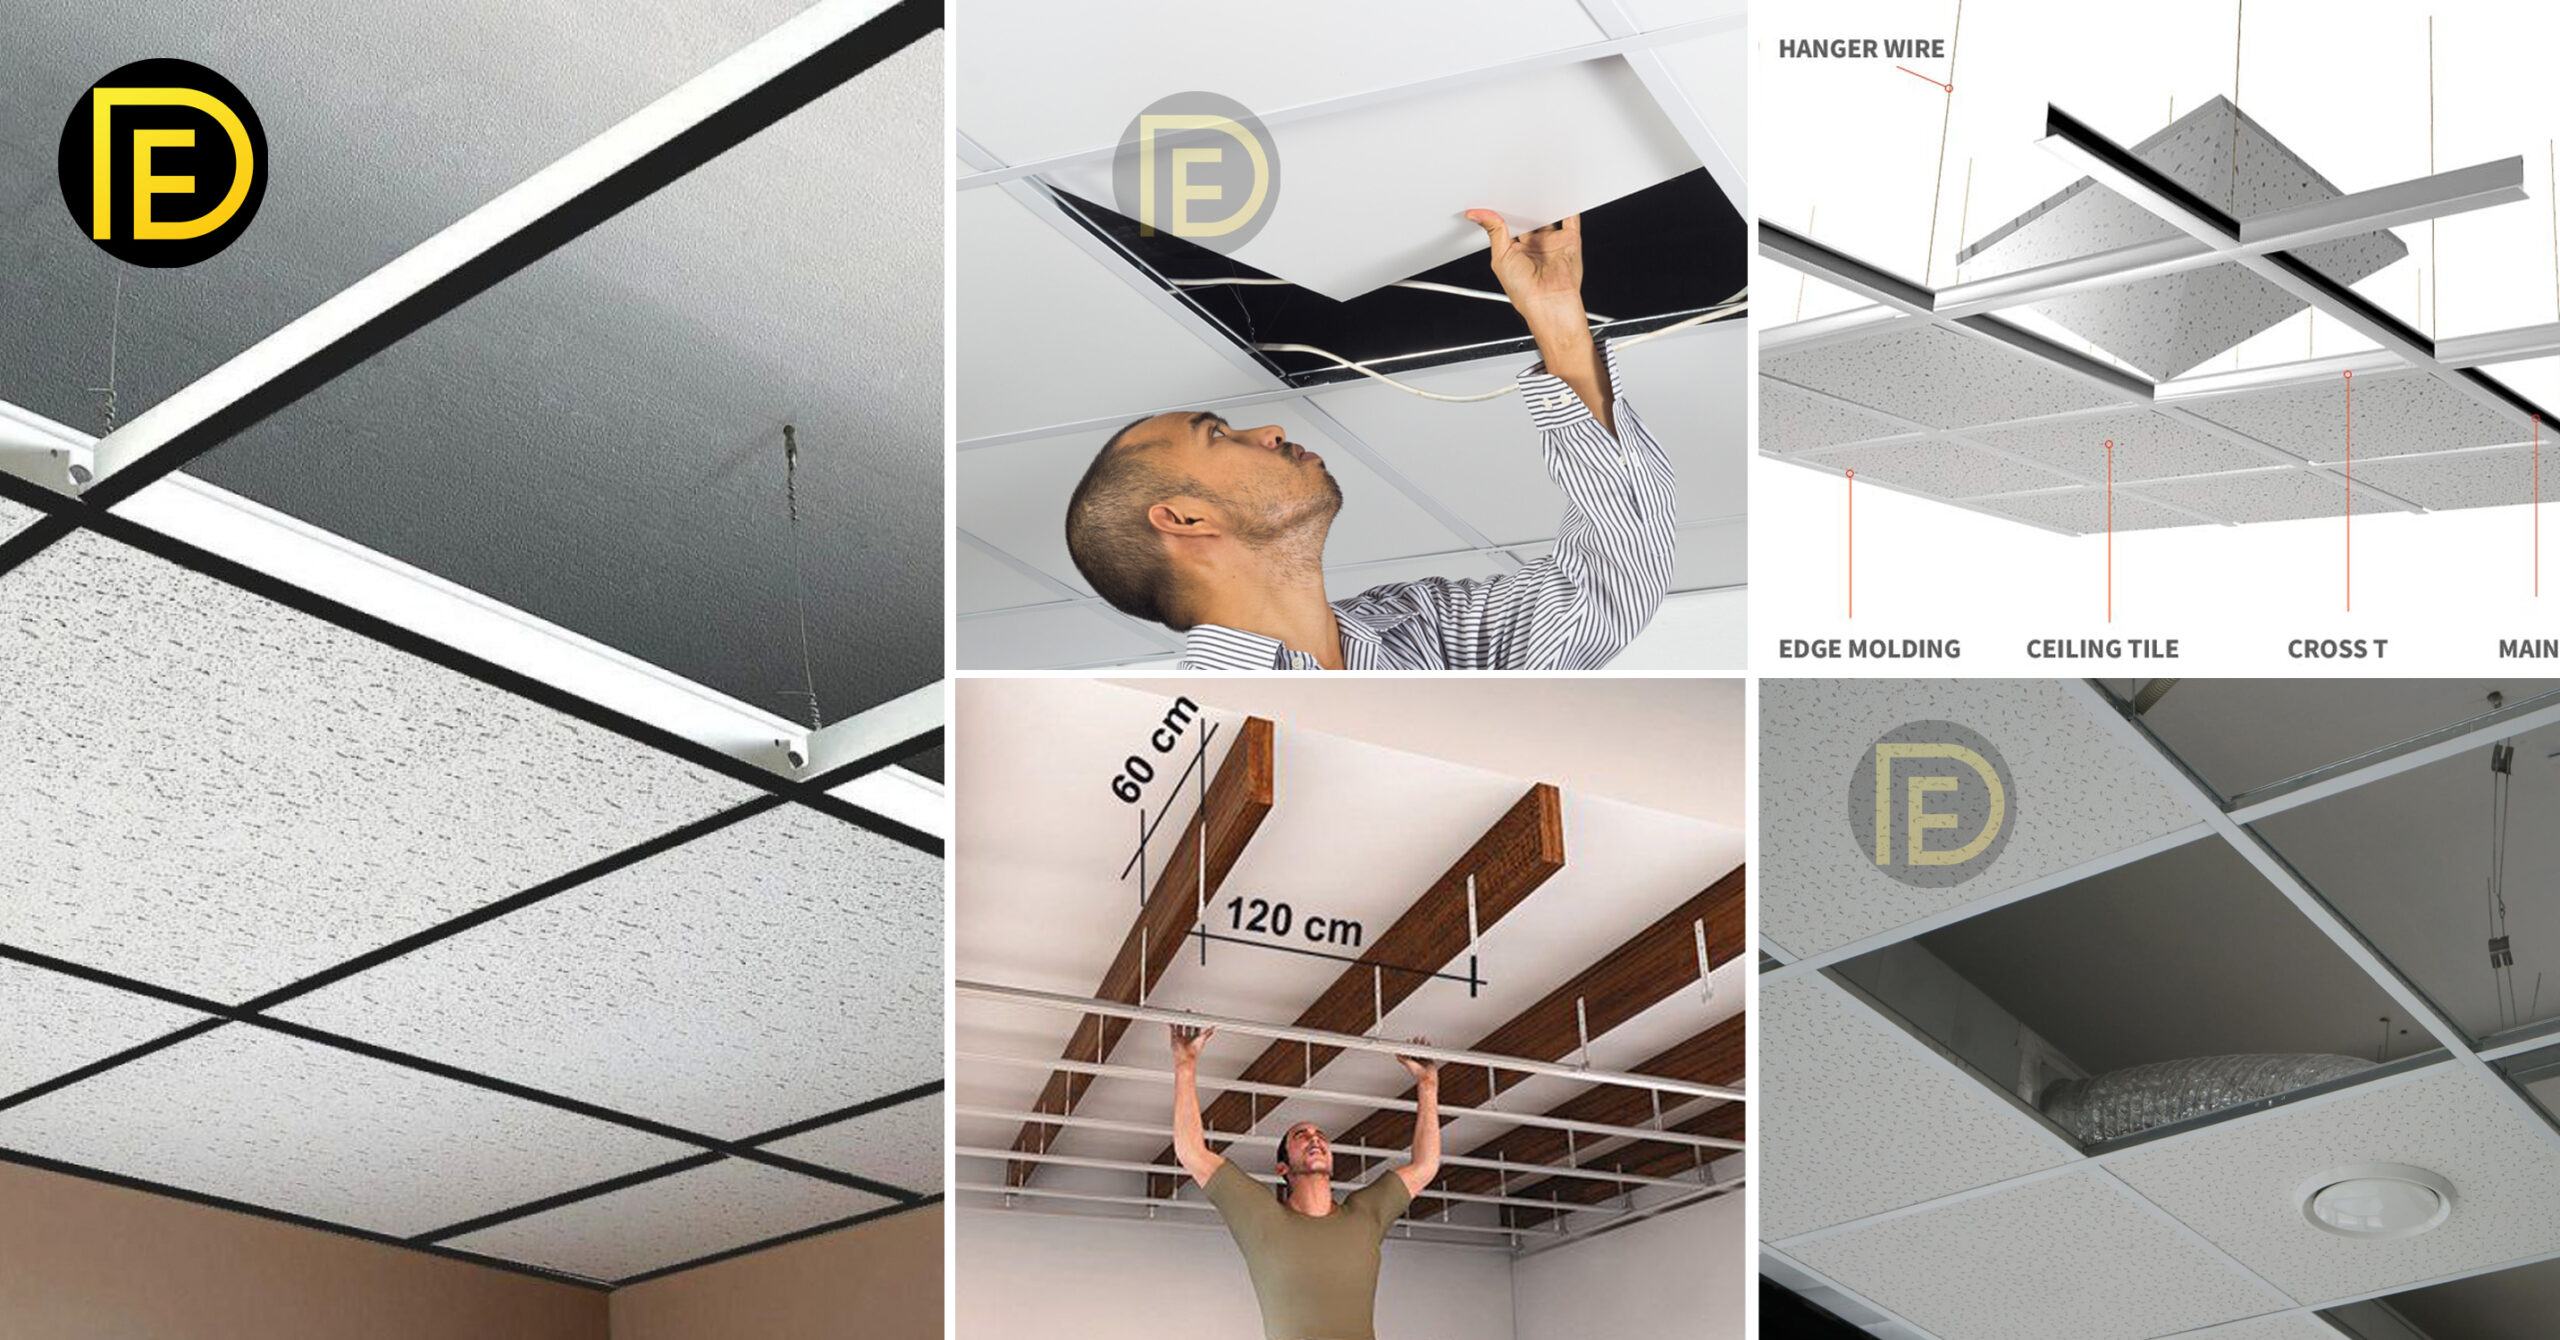
After locating the exact position for the suspended ceiling, use a level to draw a line completely around the room indicating where the wall angle will be applied. Don’t assume the original ceiling is level. Fasten the wall angles securely at all points. Nail them to studs, or use screw anchors or other fasteners on brick or masonry walls. Position the wall angle so that the bottom flange rests on the level line you have drawn on the wall. Overlap the wall angle on inside corners and miter the wall angle on outside corners. Make a temporary wooden miter box if you don’t have one. Cut any needed angles with metal cutting snips or a hacksaw.
STEP 4
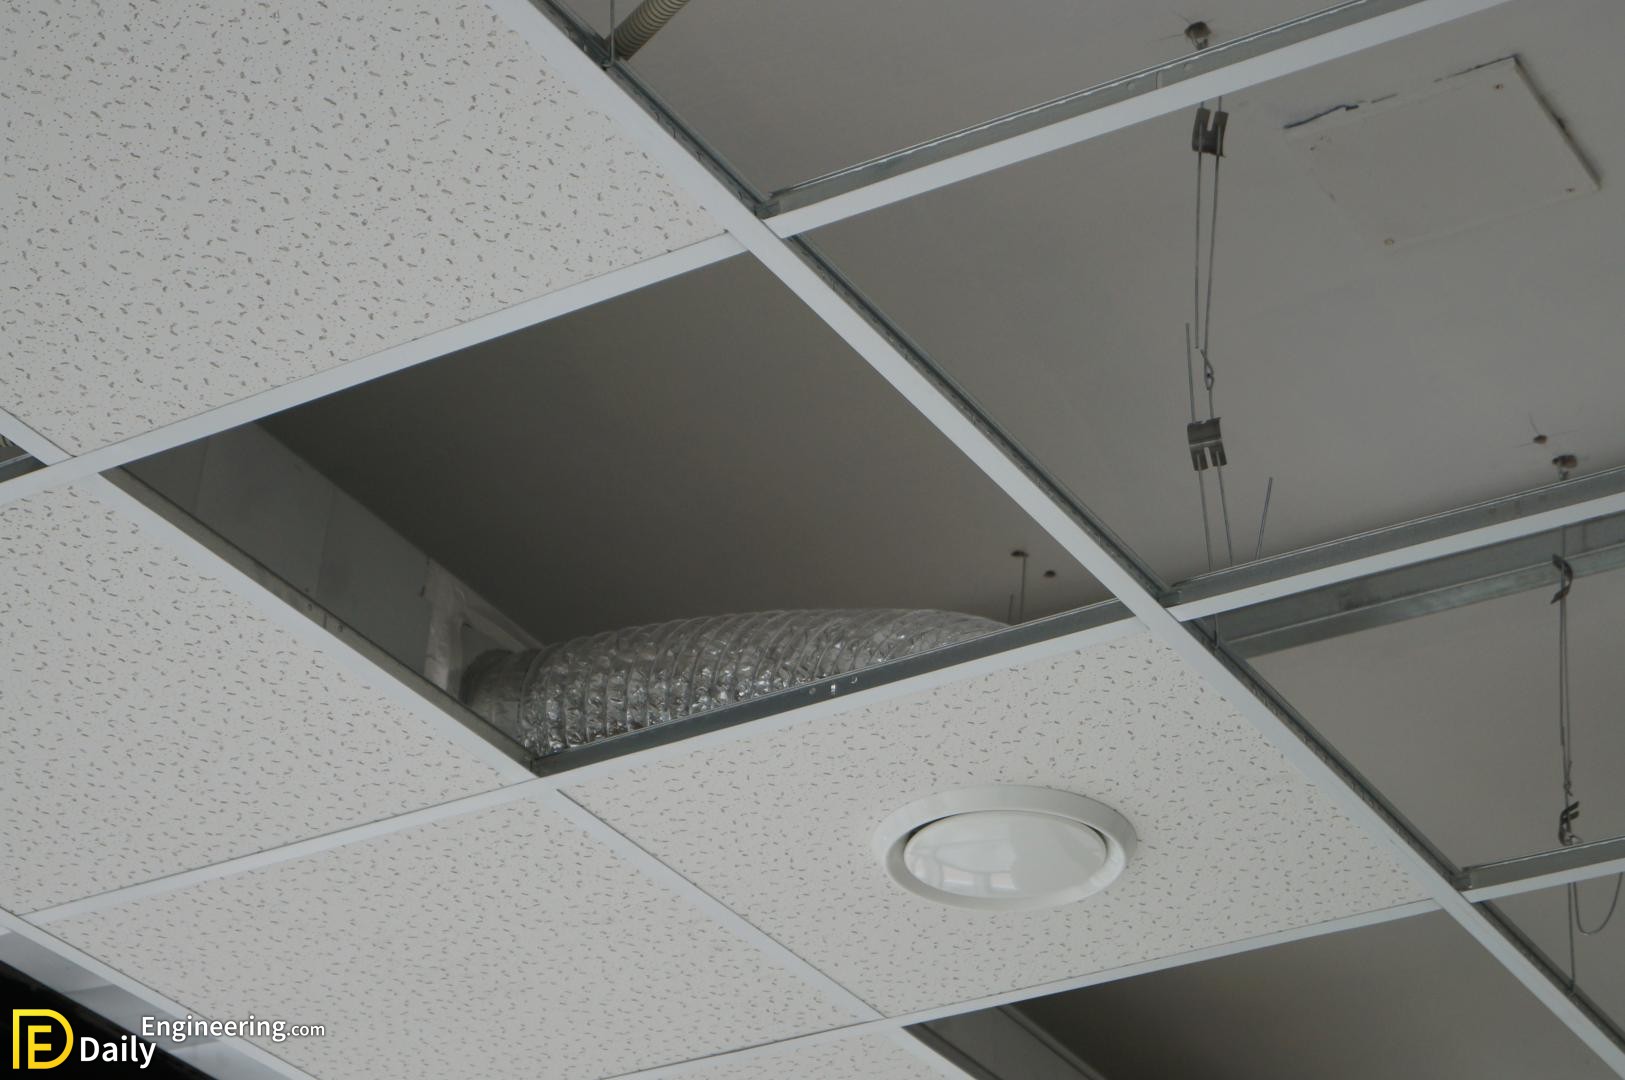
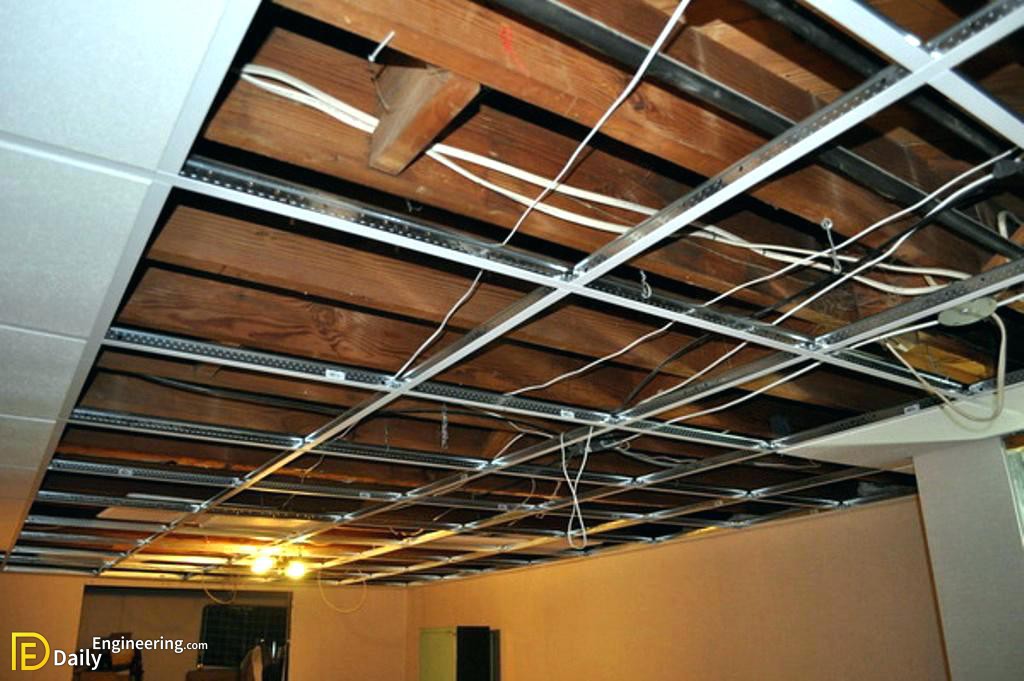
Install Wiring
If recessed lights are being installed, place the wiring before putting the suspension wires in place. For recessed lighting, use either 2″ x 2″ or 2″ x 4″ drop-in lighting fixtures, which are specially designed for this purpose. Fluorescent light fixtures can also be centered over the panels and a luminous lay-in panel can be used instead of a regular ceiling panel.
STEP 5
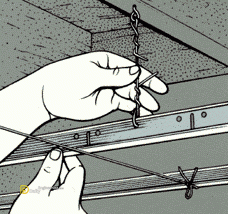
Attach Suspension Wires
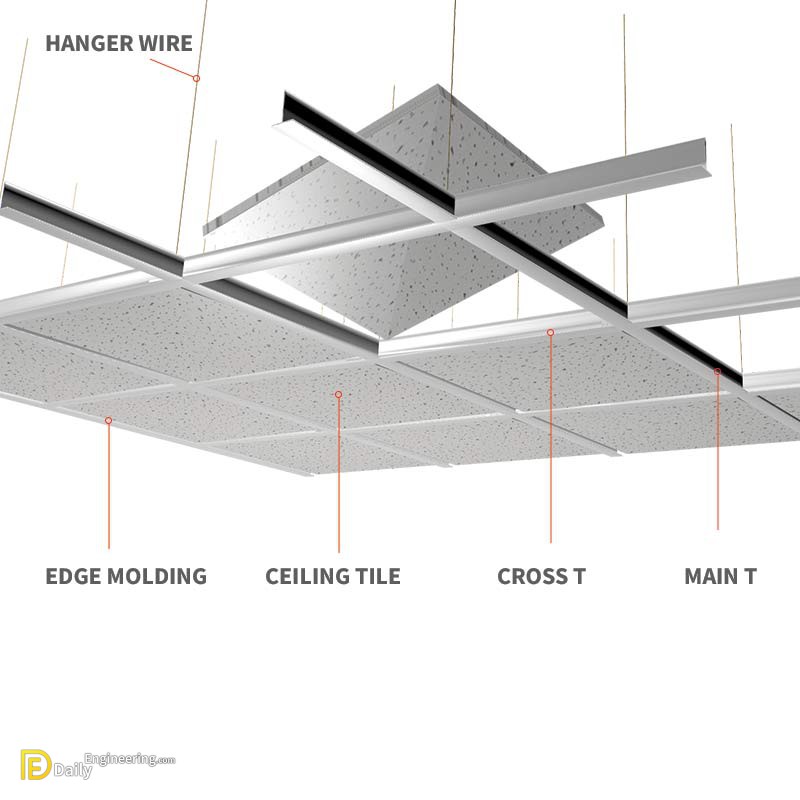
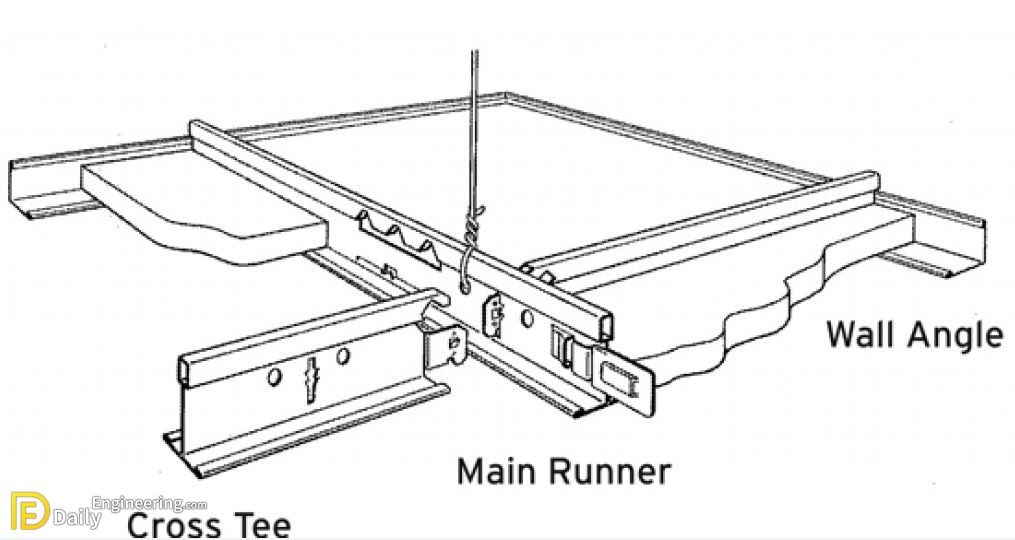
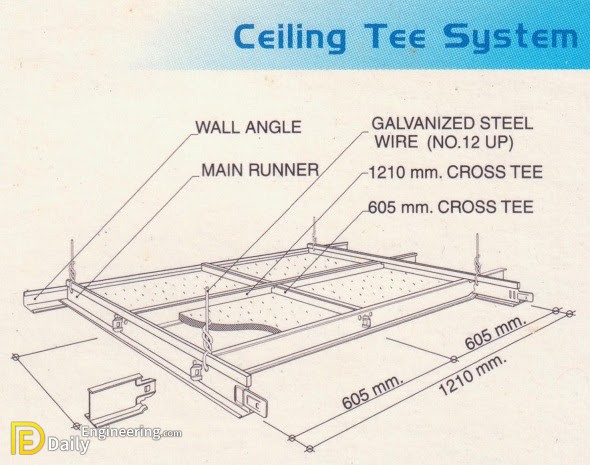
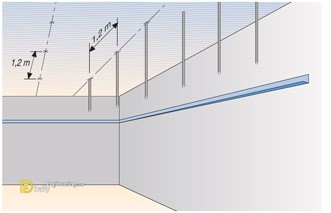
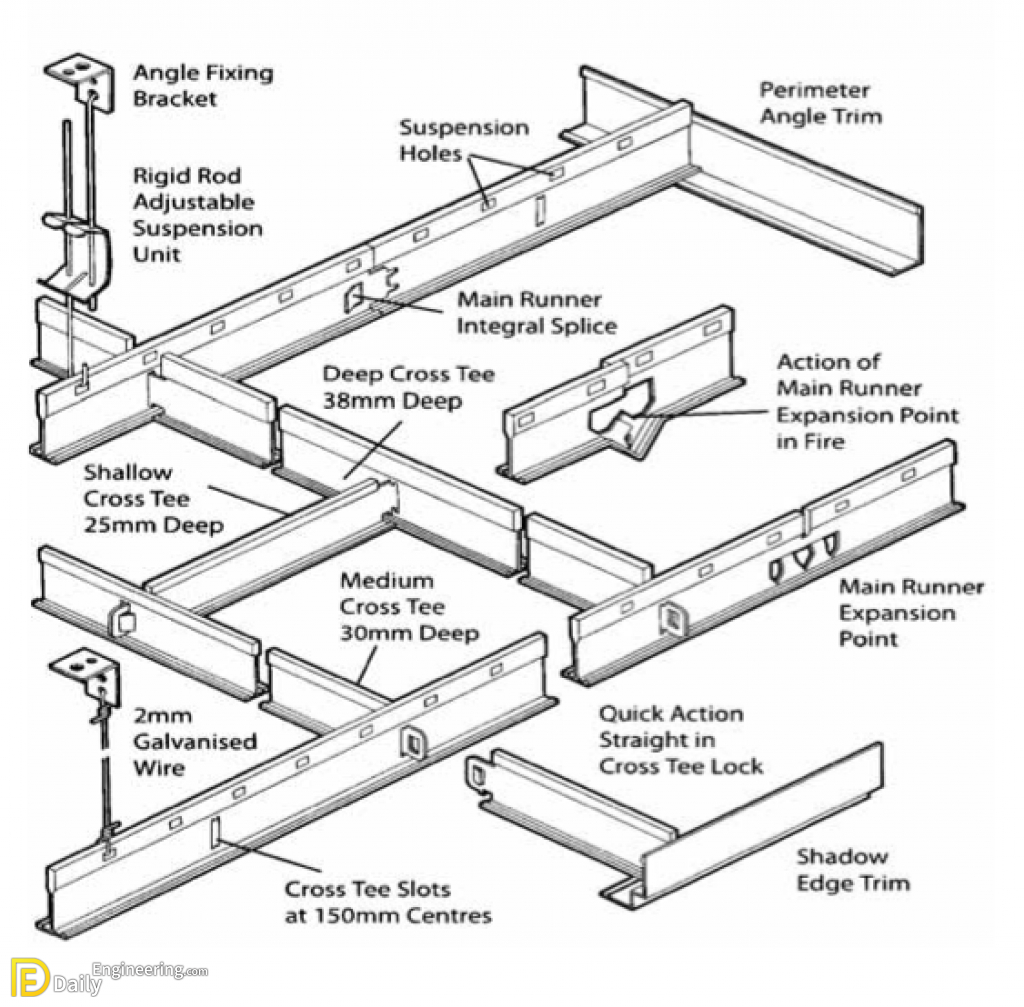
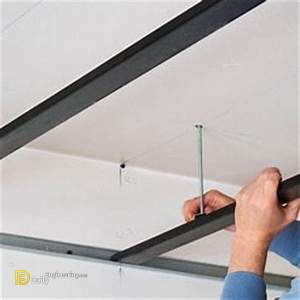
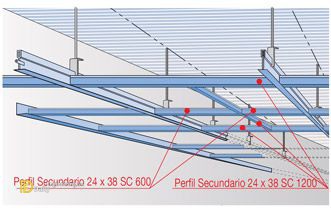
Main tees should always run at right angles to the joists in the room. Locate the position of each main tee by stretching a tight line from the top edge of the wall angle on all sides of the room at each position where the main tees are to be placed.
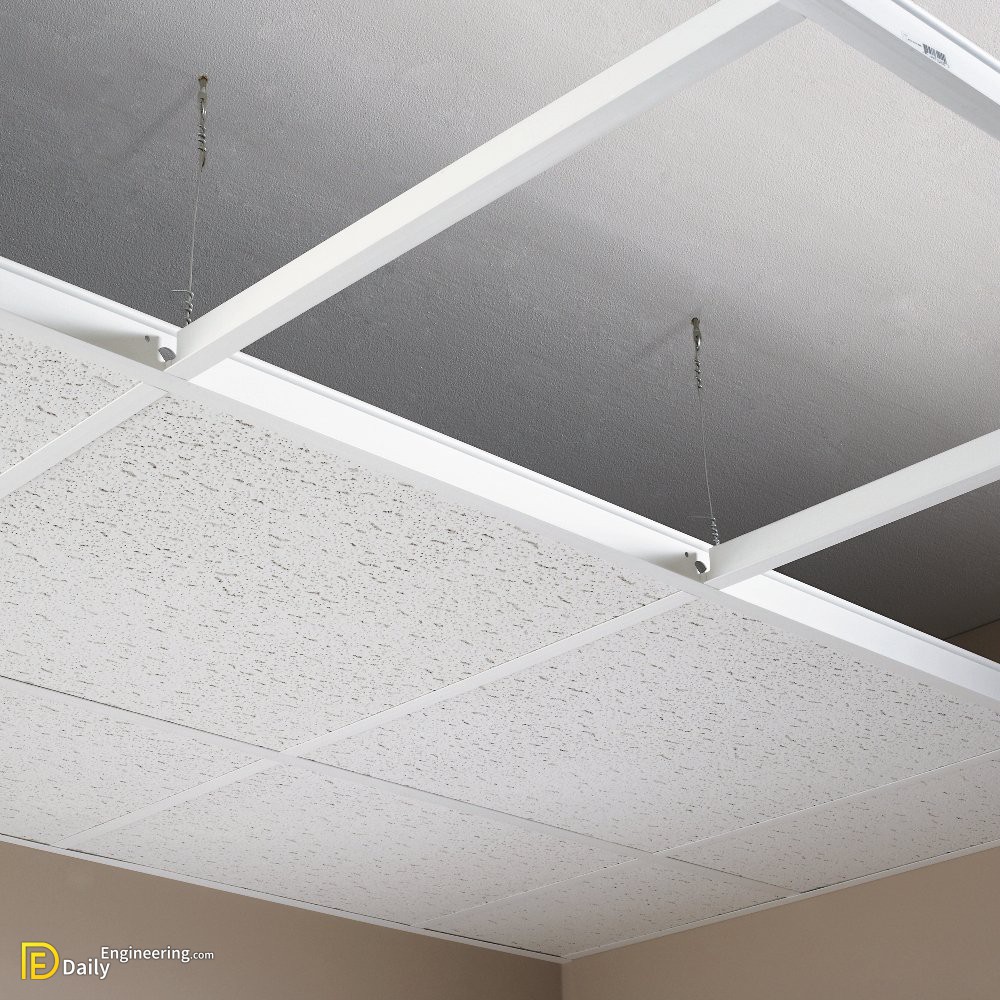
Now, cut the suspension wires to the proper length. The wires should be 12 inches longer than the distance between the old ceiling and the new guideline string. Locate the first suspension wire for each main tee directly above the point where the first cross tee meets the main tee. Check the original sketch of the room to determine this location. Be sure the suspension wires are securely fastened. Apply them to the ceiling with screw eyes, screw hooks, nails, or by drilling. Attach a suspension wire every 4 feet along with the level guideline. Stretch each wire to remove any kinks and make a 90-degree bend where the suspension wire crosses the level line.


STEP 6
Splice the Main Tees
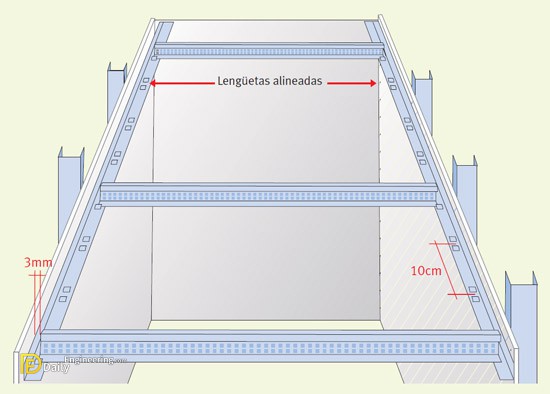
Refer to the layout sheet to determine the distance from the wall to the first cross tee. Measure this distance along the top flange of the main tee and locate the slot just beyond this point. From this slot, measure back the same distance, subtract 1/8″, and saw the main tee at that point. The 1/8″ subtraction is for the thickness of the wall angle. If the wall angles are not square, position the cross tee slots accordingly. When main tees are installed in rooms less than 12 feet across, cut the main tee to the exact measurement of the room, allowing 1/8″ for the thickness of the wall angle. For rooms wider than 12 feet, the main tee can be spliced. Be sure to align the splice so that the suspension wires are correctly positioned. Splice carefully, or all the main tees will be thrown off.
STEP 7
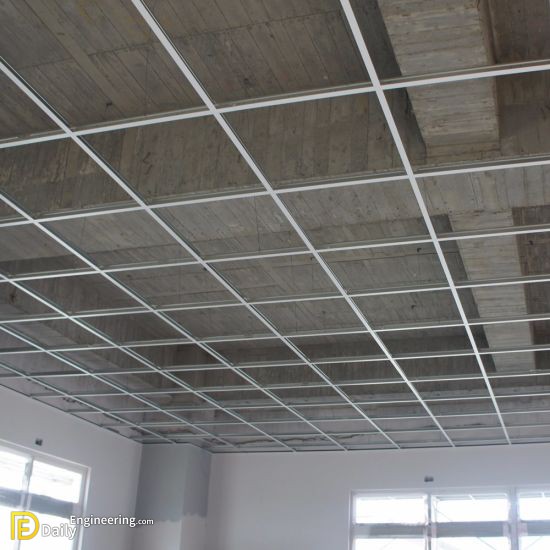
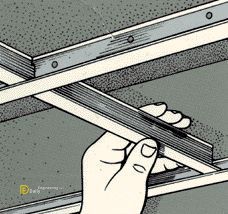
Install the Main and Cross Tees
Install the main tees so that they are all level with the wall angle already mounted. Use a long level for this. Install the cross tees by inserting the ends of the cross tees into the slots in the main tees. Use the manufacturer’s instructions for fitting the cross tees into position. Determine the location of the cross tees by the pattern selected.
STEP 8
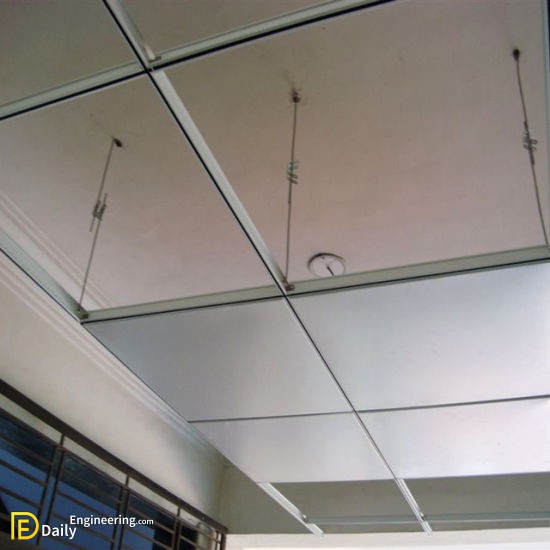
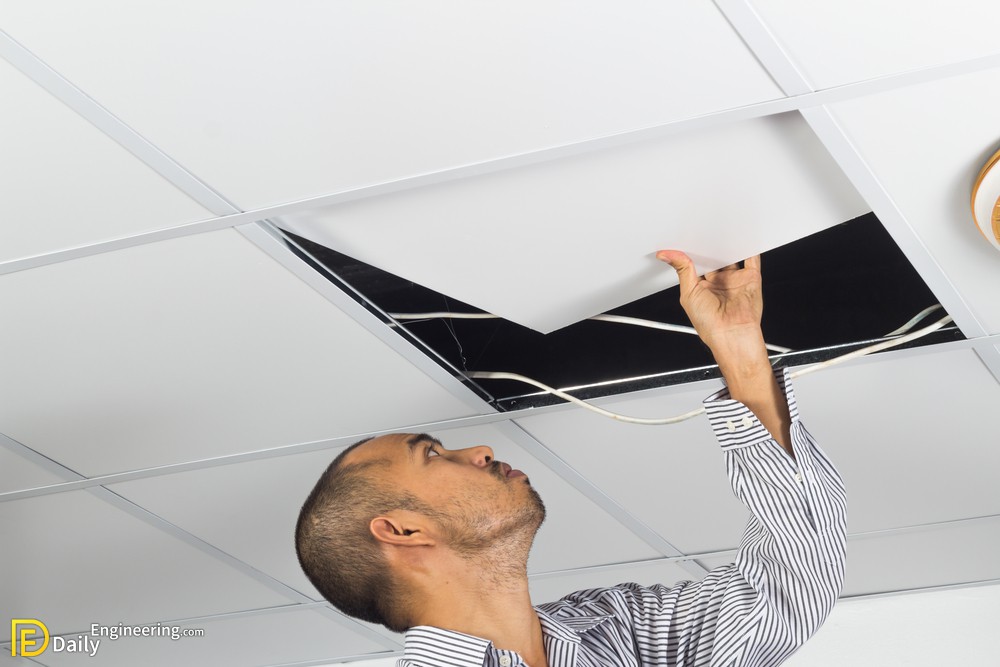
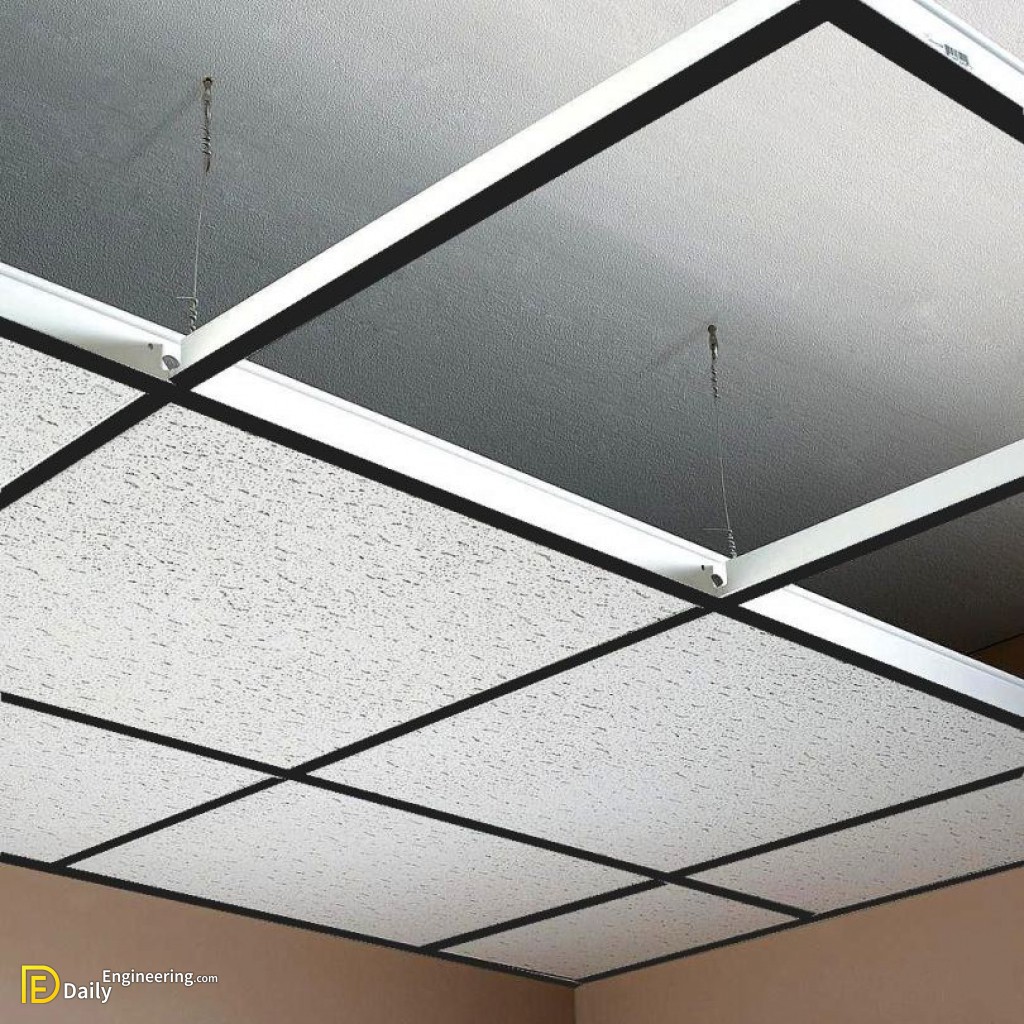
Place the Ceiling Panels
Drop the ceiling panels into position by tilting them slightly, lifting them above the framework, and letting them fall into place.


